
Digital occlusogram: the contacts, in colour
Open the upper and lower arch of the same scan and tresD Models measures, point by point, the distance between the two arches in the bite in which they were scanned. Red where they touch; orange to blue what is about to touch. Like articulating paper, but with tenths of a millimetre, both arches side by side and the contact surface on each side. In your browser, free, and your scans are never uploaded anywhere.
Open my scans nowFree · nothing to install · your scans never leave your computer
See it in action
What it measures
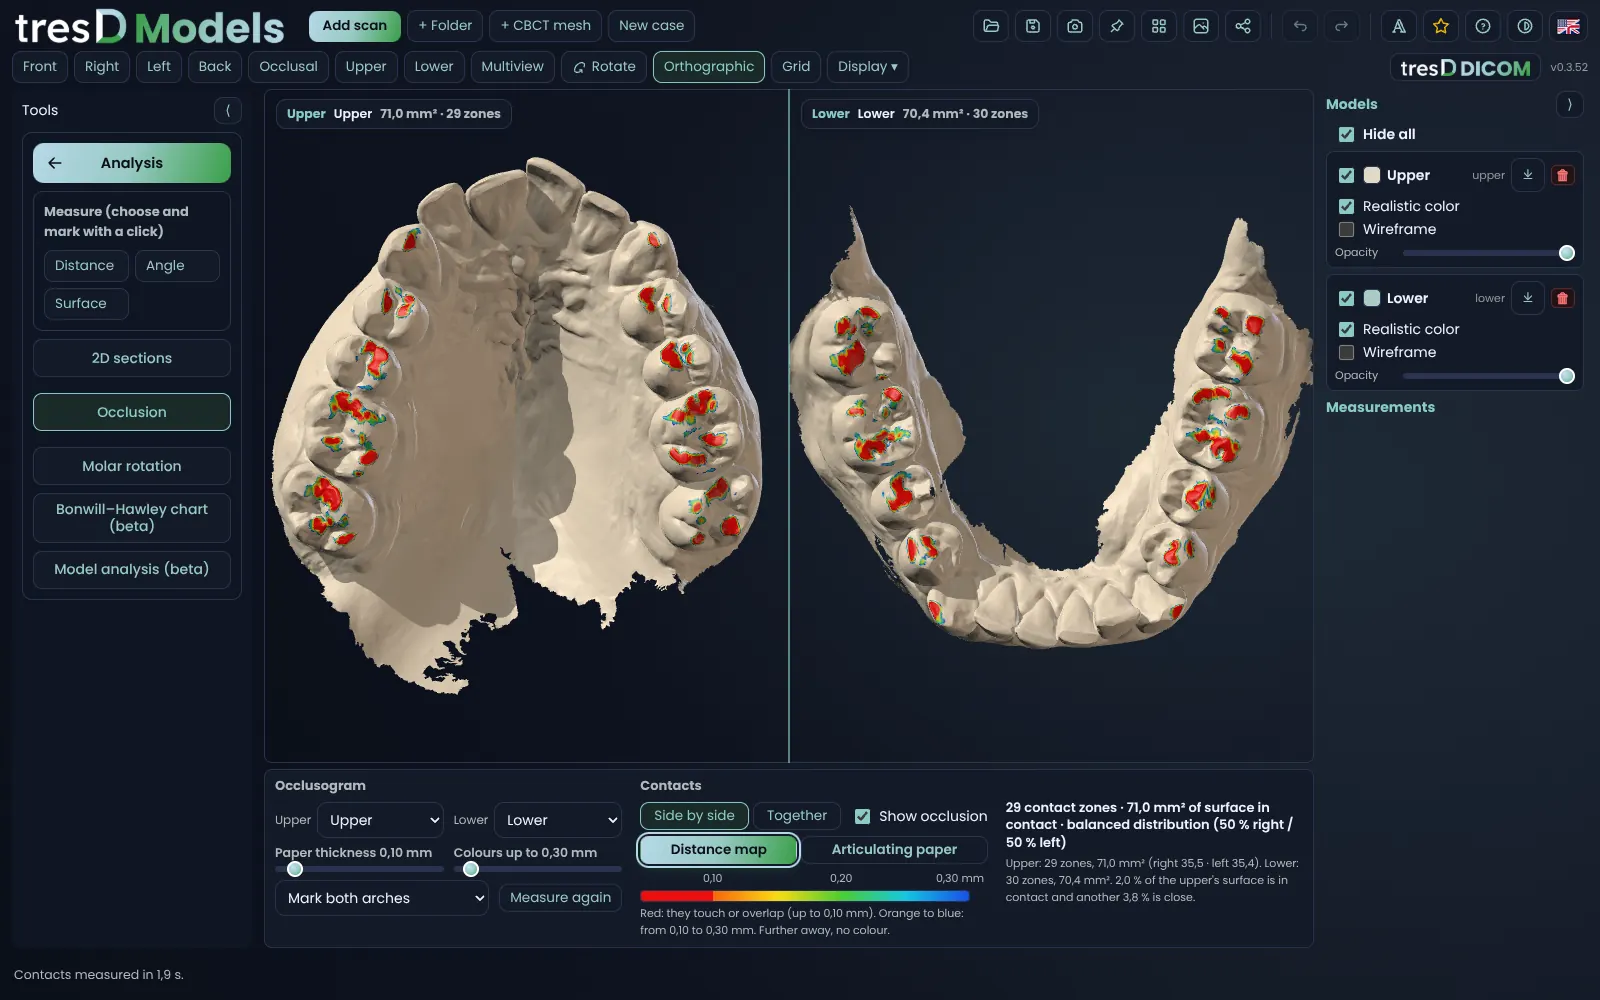
With the upper and lower arch in the bite in which they were scanned, tresD Models measures, at every point of each arch, the distance to the other one. The result is painted on the models in two ways:
| Colours | What you see |
|---|---|
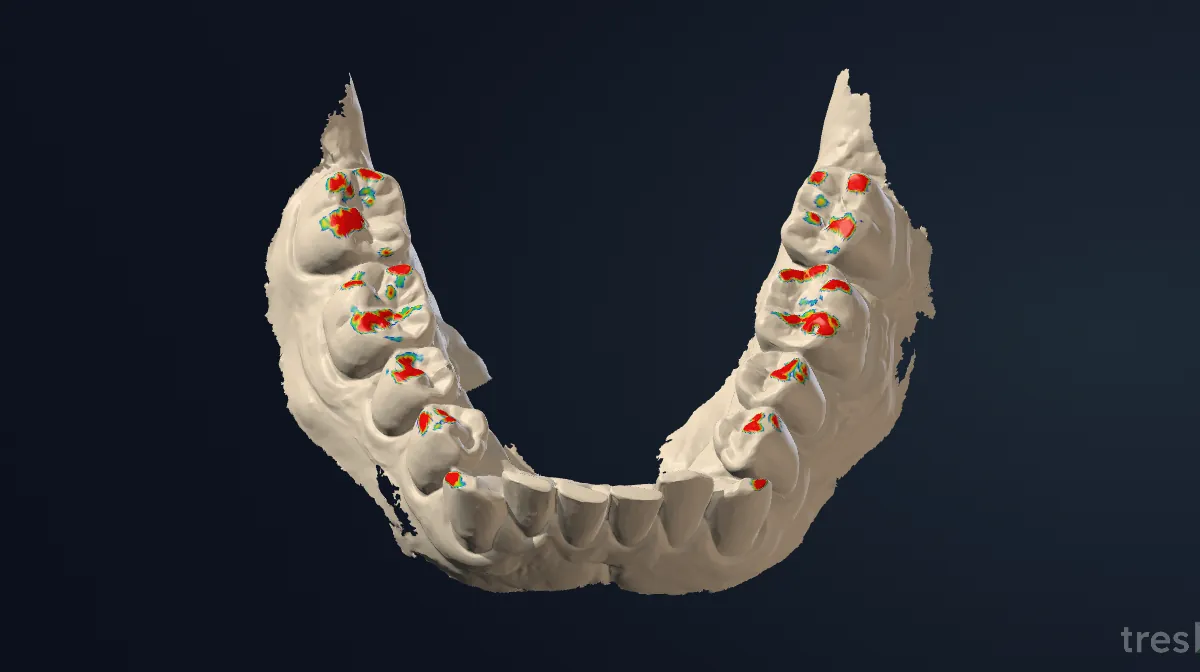
| «Distance map» | Red where they touch or overlap (up to the paper thickness, 0.10 mm by default) and, as they move apart, orange, yellow, green, cyan and blue up to «Colours up to» (0.30 mm by default). Farther away, no colour. |
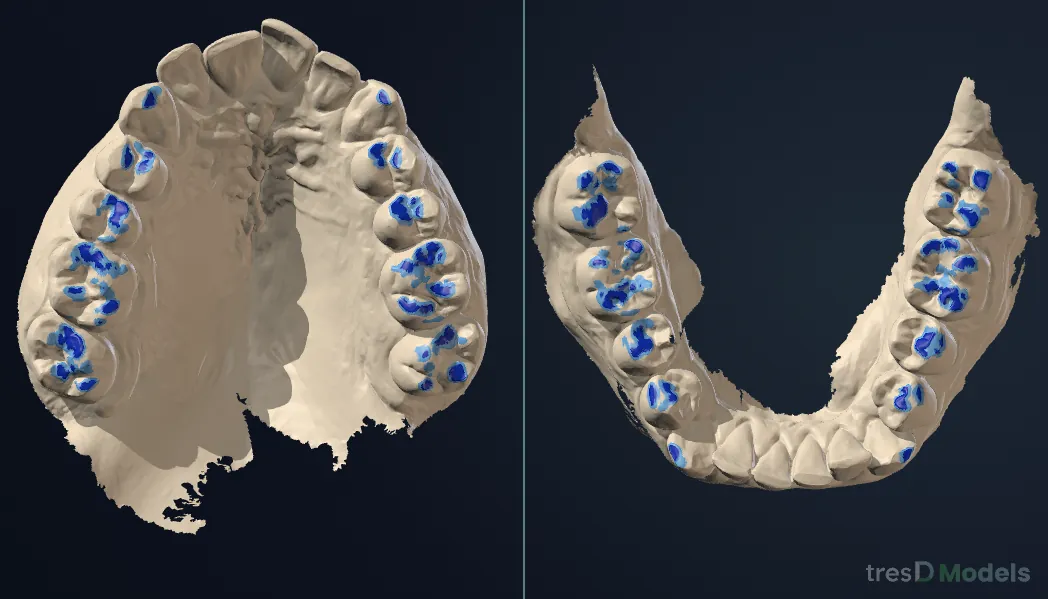
| «Articulating paper» | Blue where they touch and light blue where they are about to, like the marks of real paper. |
The two sliders, «Paper thickness» and «Colours up to», change what counts as a contact and how far the colour reaches. Next to them, the summary: the contact areas, the surface in contact in mm² and how it is shared between the right and left side.
How it looks
- «Side by side» (default): the upper arch on the left, in its occlusal view, and the lower on the right, in its own. They rotate together.
- «Together»: both arches in the viewer, as in the mouth; you can hide one to see the other.
- «Mark both arches», «Upper only» or «Lower only»: where it is painted.
- «Compare with another visit»: with the upper and lower arch of another visit open, the figures of both, side by side.
The occlusogram goes into the case report. It is indicative: it depends on how the bite was taken in the scanner.
In pictures
Step by step
Open the upper and lower arch
Go to tresdmodels.com/app and click «Add scan» with both arches of the same scan, in STL, PLY or OBJ. If they come from the same scan, they open in their bite.
Open «Analysis» and click «Occlusion»
In the menu on the left, «Analysis» and, inside it, «Occlusion». In a second the contacts are measured and painted: the upper and lower arch «Side by side», with the «Distance map».
Adjust the paper and the colours
With «Paper thickness» you decide what counts as a contact and with «Colours up to», how far the colour goes. Switch to «Articulating paper» to see it like the usual marks.
Look at the figures
On the right, the contact areas, the surface in contact and how it is shared between both sides. If you have moved an arch (for example after a superimposition), click «Measure again».
Save or share it
The viewer image, the sheet or the case report as PDF (under «Share», at the top) include the occlusogram.
If something goes wrong
It says both arches are needed
The occlusogram needs the upper and lower arch open. Add the missing one with «Add scan».
No contacts at all, or contacts everywhere
The two scans are not in their bite: they do not come from the same scan, or one of them has been moved. Open them together, as the scanner exports them, or click «Measure again» if you moved one yourself.
The contacts look too large
Lower «Paper thickness» (for example to 0.05 mm) or «Colours up to». The scanner records the bite with some pressure: it is indicative.
Watch it on video
The tresD Models tutorials on YouTube, step by step. They are in Spanish: turn on the YouTube subtitles and auto-translate them.
Common questions
Is it free?
Yes: no sign-up, no licences and no limit on models.
Are the scans uploaded to a server?
No. The distances are measured on your computer, inside the browser.
Does it work with any scanner?
With any scanner that exports the upper and lower arch in their bite, as STL, PLY or OBJ: iTero, 3Shape TRIOS, Medit and others.
How is it different from articulating paper?
Paper marks where they touch; the distance map also tells you how far apart each area is, in tenths of a millimetre. With «Articulating paper» you see it in the usual colours.
Can I compare two visits?
Yes: open the upper and lower arch of both and tick «Compare with another visit»: the figures of both, side by side.
Is it exact?
It is indicative: it depends on how the bite was recorded in the scanner. tresD Models is a visualisation and teaching tool.
Other guides
Features step by step
Try it with your scans
Free, no sign-up and nothing to install. Your scans never leave your computer.
Open my scans now