
Digital model superimposition, from T0 to T1
Open two scans of the same patient —before and after, or two time points of the treatment— and tresD Models superimposes them on the palatal rugae, on the whole model, on an area you paint or on three points. A colour map shows how much and in which direction each area has changed, in millimetres, with arrows and values, and you can export it as a video. In your browser, free, and your scans are never uploaded anywhere.
Open my scans nowFree · nothing to install · your scans never leave your computer
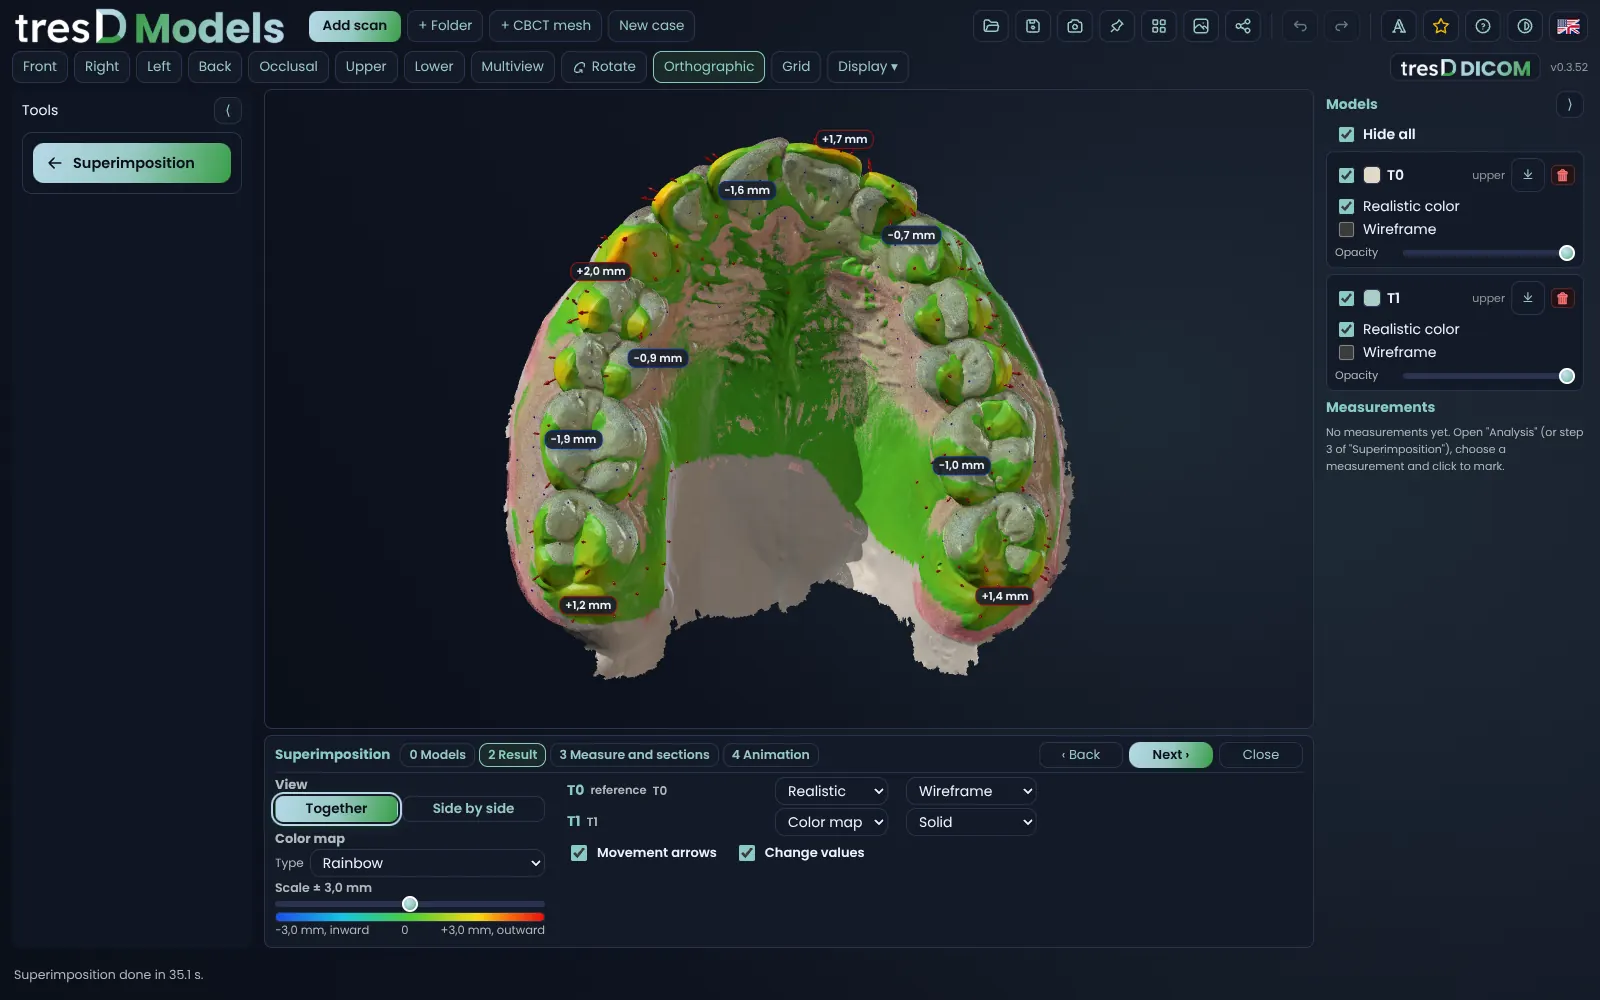
See it in action
Four ways to superimpose
You choose T0 (the reference, which stays still) and T1 (the one that moves) and, under «Superimpose by», how one is matched to the other:
| Superimpose by | When |
|---|---|
| «Palatal rugae» | On the palate, which does not move with treatment: the classic way to compare the upper teeth before and after. Upper models only. |
| «Whole model» | On the whole model, when almost nothing has moved: two scans in a row, retention, a check-up. |
| «Area I paint» | You paint on T1 with the brush what you know has not moved (the palate, some molars, an implant) and the superimposition rests only there. |
| «3 points» | You mark the same three points on T0 and on T1, each in its own window, and then the fit refines itself. |
With more than two scans (T0, T1, T2, T3…), each one is superimposed on T0 and they are shown as a series. And with «Both arches», the lower arch of each time point travels with its upper: the bite in which they were taken is never lost.
What you see afterwards
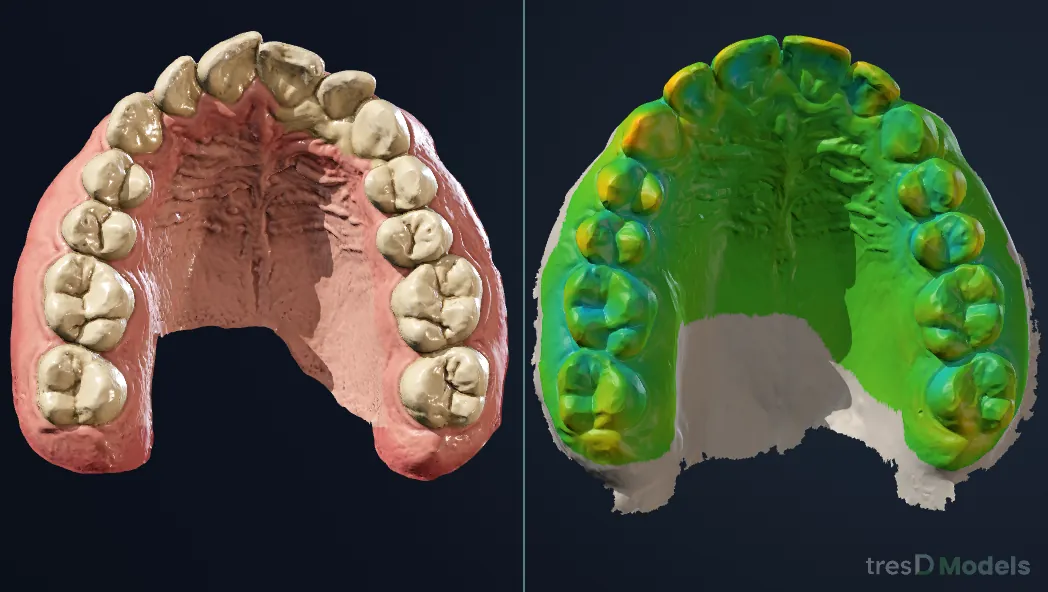
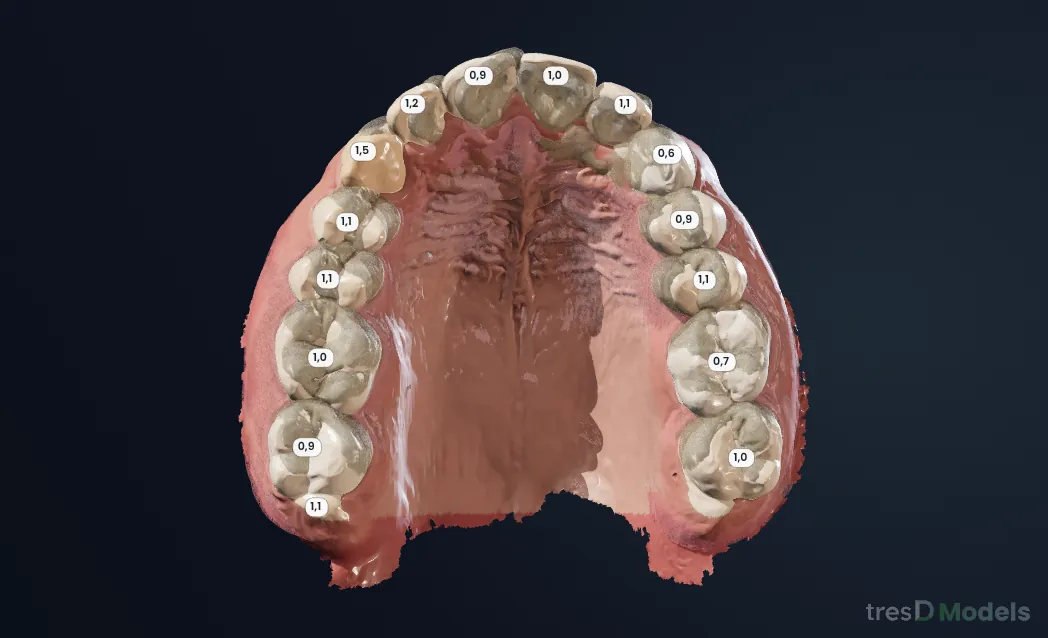
- The colour map in millimetres on T1. In «Rainbow», the default, red is what has moved outwards, green what has not changed and blue what has moved inwards. Also as a gradient, in 0.25 mm bands, only what changes, how much without direction, colour-blind friendly or per tooth (each crown with its value). The scale, ±3 mm by default, is set with a slider.
- «Movement arrows» and «Change values»: in which direction and how much each area has moved.
- «Together» or «Side by side»: superimposed, or each time point in its own window with the same camera (rotate one and they all rotate).
- Each time point with its own colour (the map, the scanner's colour or realistic) and display: solid, wireframe, translucent or hidden.
- «Measure and sections»: distances, angles and 2D sections of both models at once.
- «Animation»: an MP4 video from T0 to T1 in realistic colour, with the views you choose, in a loop (T0 → T1 → T0), vertical for social media (9:16) or with all the views at once.
Everything is indicative and goes into the case report, as PDF or PowerPoint.
In pictures
Step by step
Open both scans
Go to tresdmodels.com/app and click «Add scan» with the scans of the same patient in STL, PLY or OBJ (they can come from different scanners). If they are named T0 and T1, they are sorted automatically.
Click «Superimposition»
It is in the menu on the left. Its steps open below the viewer. In «Models», check which one is T0 (the reference) and which is T1; for a series, «+ Add another model…».
Choose how to superimpose
Under «Superimpose by», click «Palatal rugae» or «Whole model»: they are superimposed at once. With «Area I paint», paint on T1 what has not moved and click «Superimpose»; with «3 points», mark the three points in each window.
Look at the result
In «Result», T1 appears with the colour map. Tick «Movement arrows» and «Change values», change the map type or the scale and choose «Together» or «Side by side».
Export the video or the report
In «Animation», choose the views and how long each one lasts and download the video. Under «Share» (at the top), the «Case report (PDF)» includes the superimposition with its map.
If something goes wrong
«Palatal rugae» does not appear
It is only available with upper models. With two lower models, use «Whole model», «Area I paint» or «3 points».
The status bar says the fit is poor
The surfaces barely match: very different scans, a trimmed palate or a lot of movement. Try «Area I paint» on a stable area, or «3 points».
T0 and T1 are the wrong way round
In «Models», choose by hand which one is T0 (the reference) and which is T1, and superimpose again.
To get a good result
Scan the whole palate at both visits: the rugae are the reference. If a scan has mucosa remnants or a ragged edge, clean it first with «Edit models». And to compare the bite too, open the upper and the lower arch of each visit and tick «Both arches».
Watch it on video
The tresD Models tutorials on YouTube, step by step. They are in Spanish: turn on the YouTube subtitles and auto-translate them.
Common questions
Is it free?
Yes: no sign-up, no licences and no limit on models.
Are the scans uploaded to a server?
No. The superimposition is computed on your computer, inside the browser.
Can I superimpose scans from different brands?
Yes: for example a T0 from iTero and a T1 from 3Shape TRIOS, in STL, PLY or OBJ.
What about lower models?
Yes, with «Whole model», «Area I paint» or «3 points». The palatal rugae are only on the upper arch.
Can I export the result?
Yes: the viewer image, the sheet, the animation video and the case report as PDF or PowerPoint.
Are the measurements exact?
They are indicative: tresD Models is a visualisation and teaching tool.
Other guides
Features step by step
Try it with your scans
Free, no sign-up and nothing to install. Your scans never leave your computer.
Open my scans now